Wednesday, March 28, 2012

Chicken Parmesan, Healthy Time

Now chicken parmesan is a delicious, generally not healthy Italian meal. On a whim (found a recipe on Pinterest, had all ingredients at home and no plan for dinner) I decided to try and make it! Luckily this is a healthier version, the chicken parmesan part at least. If I hadn't served it with pasta it would have even been better.

Parmesan Chicken : Weight Watchers 2pts
Original Recipe found here


Ingredients: 
  • 1/4 cup parmesan cheese , grated
  • 2 tablespoons dried Italian seasoned breadcrumbs(or 2 tbsp bread crumbs and a pinch of Italian spice blend) 
  • 1/8 teaspoon paprika
  • 1 teaspoon dried parsley
  • 1/2 teaspoon garlic powder
  • 1/4 teaspoon fresh ground pepper
  • 2 boneless skinless chicken breasts 

 Directions:

1. Preheat oven to 400 degrees
2. In a shallow/flat bottomed bowl combine cheese, bread crumbs and seasonings; mix well


3. Dip each chicken breast into cheese mixture, making sure to coat all sides


4. Arrange on a nonstick baking sheet or pan


5. Bake for 20-25 min, until chicken is cooked through
4 points per serving  


We also served it with a salad, and  yes there were left overs! Quite quite tasty, and quite fabulous.

What's your favorite dish? To make, or to eat!

Tuesday, March 27, 2012

Mission (almost) Accomplished

Yay for the big reveal! Except its not so big since I didn't have time to hang all our pictures back up last night. Oops. Well at least you'll get to see the finished paint color and how most of our furniture looks against it.

Ready?

Set.

Go!
(please do excuse the shotty iPhone photos)

Night:


I have to say the grey looks much warmer in person.


Day:


Quite excited on how they turned out.

What colors have you always dreamed of painting a room but have been to scared to?

Monday, March 26, 2012

Color me Tickled

Painting weekend!!! Woot! This weekend we were busy busy bees. And it feels wonderful. After long last we FINALLY got the bedrooms painted. Of course it just so happened to be a beautiful spring weekend in Western Washington. Such is life.

Prep work. The worst part of painting. First I washed all the walls and trim. Gross. Unfortunately this is an important step especially if you're planning on taping off anything, the tape won't stick to the dirt/oils.

Then I spackled all the holes in the walls (the previous owners left us with some doozies). I used DAP DryDex spacke ($5.00 at Lowes) and a 3" flexible spackle knife ($6.50 at Lowes - annoying its more expensive than the spackle itself!).


It goes on pink and when its dry it turns white, kind of nice to be able to know when you're ready for the second coat. You really only need a second coat when it comes to deep holes over 1/4 inch or so.


Other than that just go for it! You want to make sure to get it as flat as possible and not much residue around the hole, get most of the spackle in the hole.  In theory you're supposed to sand it after it dries which I didn't. Kinda wish that I had but I don't think you can really notice it unless you know where to look. I also didn't texture the filled holes after painting, they're so small.

Then comes the taping. And tape we did. We used two whole rolls of 1.5 inch Scotch painters tape for all three rooms.

Looking down the hallway, first door on left is old "boys" room, second on left is "master" and at the end of the hall is the old "girls" room. Door on right is bathroom. 
We took all the doors off the hinges and taped off the trim and put plastic sheeting over it. As you can see we have pretty thick trim, which I love, but it becomes hazardous when painting.

This is in the "boys" room, it has a band of trim around the room allowing for two colors and making for a joy of prepping experience. If you haven't taped off this type of trim before its hard, the tape doesn't want to stick to it cause there isn't much of a lip/edge to stick to. Even with taping and papering off like this we still have places where paint got on it. Oops.


Here you can see the dual colors we were working with. Very masculine. Very not what I wanted. And that upper taupe/beige color, so over it.


You can see the white splotches were I spackled, this was the worst of the rooms for holes. This room is really more of an office than anything but since Michael and I both came into the relationship with futons that we're being stubborn about getting rid of we wedged his old one into this room (currently sitting diagonal).


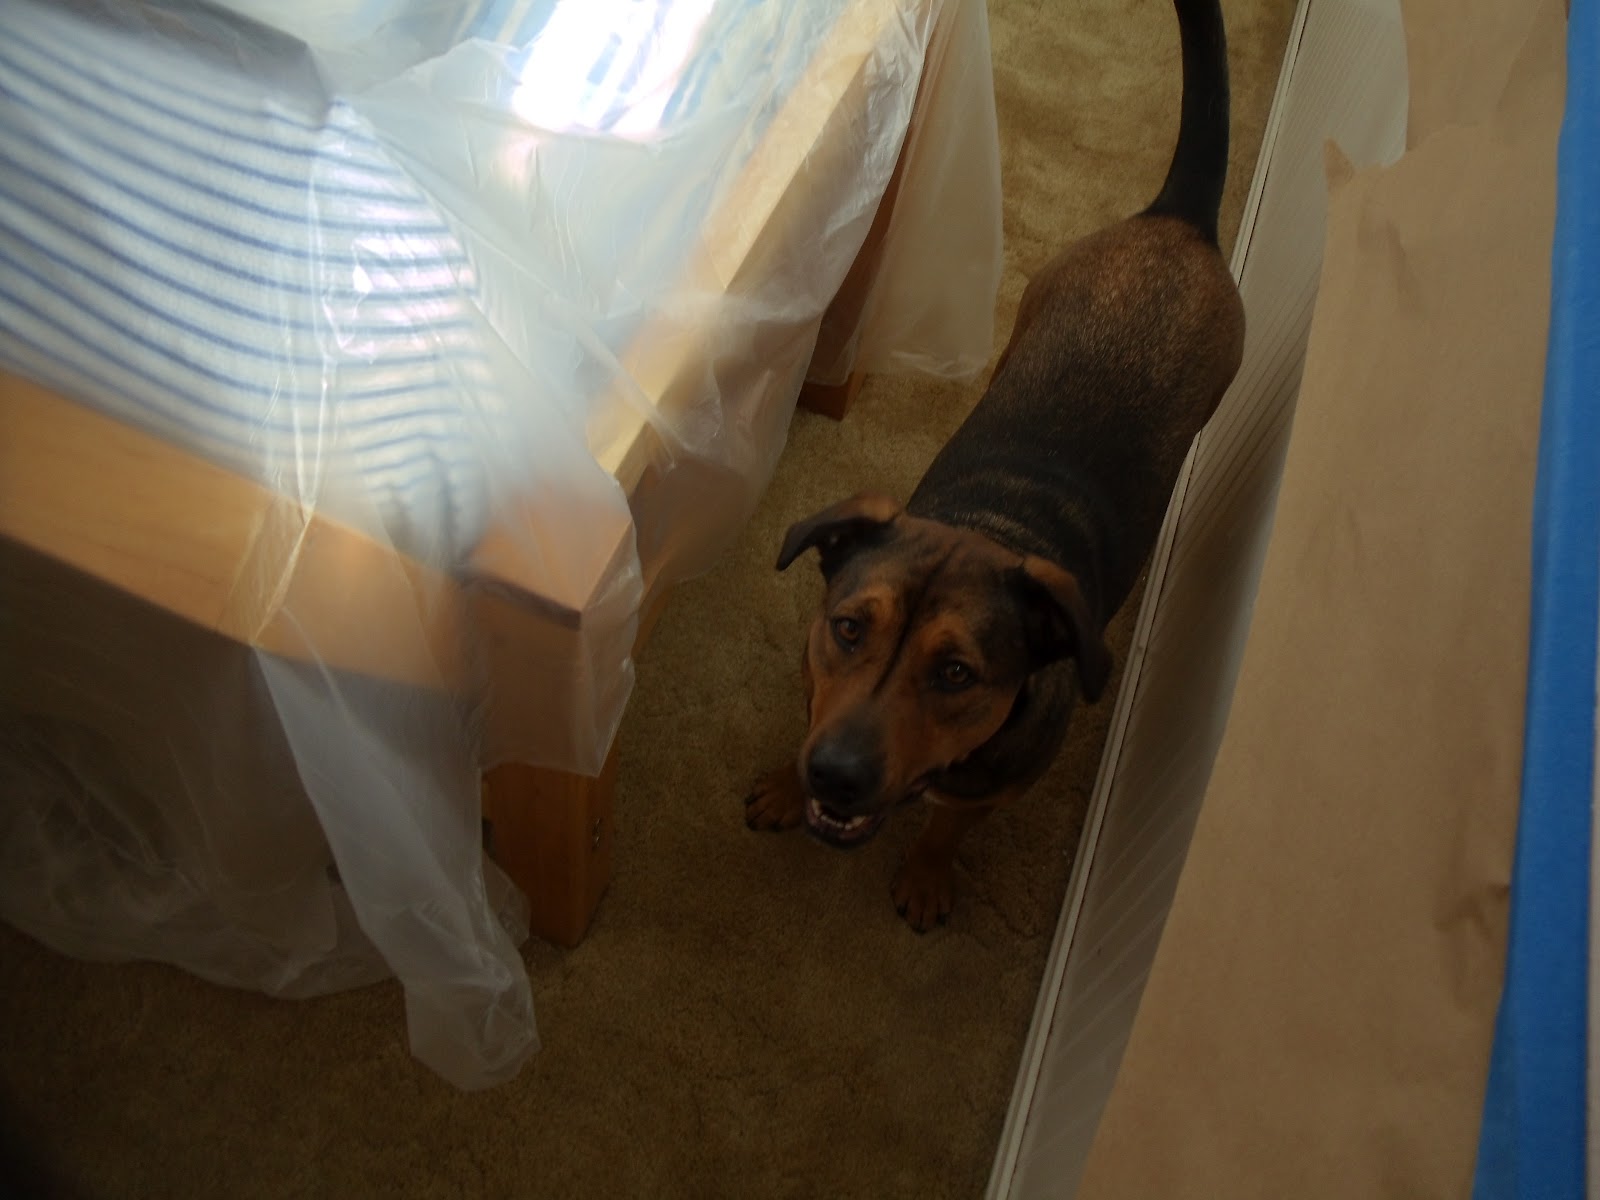
Molly helping out :-)
 Now on to the old girls room. It's pink. Now in general I'm not even a fan of pink to begin with. At all. I can take it in small doses in the right shade or application. I do in fact own one pink shirt. Pink peonies I adore. Pink rooms, not so much.


And its pink. Ugh. Anyways we loved the wainscoting, it gives the room texture and a nice touch. It doesn't help this is the room that we see every day walking down the hallway, and I don't like shutting the bedroom doors because it makes the hallway so dark. 


Please note the green swirly detailing towards the ceiling. I'd really make an awful princess.

Moving on to our room. As stated previously our room isn't much of a master room, just the larger of the rooms in the house. Sigh. Next house I'll get my master closet/bathroom! Luckily this room only needed simple taping off of the baseboards and door/window trim. 


Notice the same taupe/beige color that was in the boys room, and the hallway, and the bathroom and in the living room. I'm so tired of looking at this color, I get that it goes with everything and is neutral but goodness, it has no life to it! 


Of course we have already lived here for 6 months so we just moved everything to the center of the rooms (and shoved more out into the living room) and put layers upon layers of plastic over it. We were a little too eager to move in when we bought it so not much thinking ahead was done.

Please do take note of the size of our "master" closet. And yes it's equally divided between Michael space and mine. Girls I will take your sympathy now.

We kind of did things backwards and are planning on painting the ceiling later (if ever). To me it looks slightly dull (we're leaving the ceiling white) but I'm pretty sure Michael would kill me if I asked him to paint in this house again. Hence the "if ever".

Now I'm going to do a "big reveal" finished product post tomorrow but I'll give you a sneak peak on the colors we chose.

"Girls" room
"Master" room

The green color is decently represented in that picture, the brown/grey not so much. But you kind of get the point. The guest bedrooms were both painted the green and the master was the brown/grey. We went eggshell finish in Behr paint and primer, the green color is "Rejuvenate" and the brown/grey is "Suede Grey". There was another brown/grey we were looking at that was "Elephant Skin" that I really liked and was wanting cause the name was so awesome.

Come check out the big reveal tomorrow! Anyone see The Hunger Games this weekend? What did you think (especially those of you who read the books)?

Friday, March 23, 2012

Project Rut

It pains me that I haven't been able to share with you my lovely projects that I've been working on the last week or so. I jumped the gun on dangling them for you to anticipate. My bad! But its Friday and we have a rather exciting weekend coming up (I'm excited about it at least!) and I figure why not give you a sneak peak!

As I mentioned last week my goal this weekend was to get my file cabinet painted...

Well this is what I had to start with. Again, solid wood and $15 from CraigsList (love CraigsList). I've had it for over 2 years now and am finally getting to it.

Now another teaser for ya! My surprise project that I thought of Friday and was determined to make happen.


Ok so it's not my project but its my inspiration!

And guess what my exciting weekend entails!? WE"RE PAINTING!!! WooHoo!!!! Finally getting the guest rooms and our bedroom painted, we'll see once and for all if the darker grey is a yay or a nay in our bedroom. Either way it'll be that color cause at $30 a gallon we're not going back for a while! Quite excited! I'm also seeing The Hunger Games  Saturday night in an epic girls night. Can't wait. Loved the books, read them in a week, the last one cover to cover in a day. No big deal. Oh and we're going to a Sounders game tonight (Seattle's soccer team).

So now to recap my project to do's:
  1. Painting file cabinet : DONE (except for just finishing it)
  2. Painting bedrooms : THIS WEEKEND! 
  3. Build raised beds for garden : unfortunately, or I suppose fortunately for our foundations, my mother and grandmother had some brilliant insight when it came to this project. With how our house is situated and how the current lovely back yard is laid out landscaping wise the most logical placement of these raised beds would be along the house and along the garage. Well then comes the issue of water infiltration and its potential damage to our foundations of said buildings. Joy kill. Totally makes sense though. So I'm scaling back that project and going to start with a few potted gardens and go from there.
  4. Build an upholstered storage bench : still to do 

and I've added a few more things:
  1.  Pumpkin decorations (see inspiration below)
  2. clay bowls (see inspiration to right) 


What fun projects do you have coming up? Anyone seeing The Hunger Games this weekend?

Thursday, March 22, 2012

Pumpkin Mac and Cheese

pumpkin, mac and cheese, baked, cheese, holiday, paprika 
If you know nothing about me the one thing you should know is that I love cheese. Straight out love affair. Add that to pasta and I would leave Michael and run off into the sunset with it.

Kidding.

Only a little bit.

But seriously mac and cheese is the combination of my two favorite food items ever. So when we decided to host a small holiday party and I came across this pumpkin mac and cheese recipe I was intrigued. I have made plenty of mac and cheese variations generally with different cheese combinations and adding simple things like onions and bacon but never with something so out of the box. I like pumpkin so I figured why not.

I have an estimating problem I guess you would call it. For example, with left overs I rarely pick a container that's just right, normally its too small, or gigantic. With furniture I have a difficult time not only imagining how things will look in a space but how they'll fit. I was convinced our sectional we got for our tv room would block most of the entrance to the area. I was totally wrong.

Same goes with serving sizes of food, I worry about running out so I generally double the amount that's necessary. So I end up with left overs. That I put in wrong sized containers. Viscous cycle.

That being said I doubled this recipe for about 16 people or so. We never touched the second batch. Oops!

http://www.pbs.org/food/fresh-tastes/pumpkin-mac-and-cheese/

Pumpkin Mac and Cheese
Adapted from: http://www.pbs.org/food/fresh-tastes/pumpkin-mac-and-cheese/

Ingredients

  • 16 oz small shell pasta (I used orecchiette)
  • 3 tbsp butter
  • 3 tbsp flour
  • 4 cups milk
  • 16 oz grated cheese blend
  • ¾ cup pumpkin puree (1/2 15-oz can)
  • 1.5 tsp minced fresh rosemary (I used a little over 2 tsp of dried)
  • 1 tsp salt
  • 2 tsp pepper
  • ¼ tsp cayenne (you can use another ¼ if you like a bit more of a kick)
  • ½ cup panko breadcrumbs

Directions

  1. Preheat oven to 400 degrees.
  2. Cook pasta in boiling salted water. Drain and rinse with cold water. Set aside.
  3. In a heavy saucepot over medium high heat, melt the butter and add the flour. Whisk together and cook for thirty seconds. Add 2 cups milk and minced rosemary and whisk until smooth. Add another cup of the milk (reserving one cup) and continue to whisk. Cook for four minutes while whisking.
  4. Add 12 ounces of the grated mixed cheese (reserving about a handful of grated cheese) and stir well so that the cheese melts. Add the salt, pepper and cayenne followed by the additional cup of milk and the pumpkin puree.
  5. Once everything is smooth, add the cooked macaroni and toss well. Pour into a 9″13″ casserole pan and top with the remaining grated cheese and the breadcrumbs.
  6. Bake for 25 minutes until golden brown and bubbling.
http://www.pbs.org/food/fresh-tastes/pumpkin-mac-and-cheese/
Super super super good. My only downfall was in the original directions it claimed the sauce was going to get thick. It never happened to me. So in my11.00 pm fervor of trying to prep this dish the night before the party I kept adding, and adding, and adding flour and it still never got thick. Definitely a mistake. While the taste was lovely the texture was not. 
On that note I made this (cooked pasta, sauce etc) the night before, covered it in saran wrap and put in the fridge overnight and it turned out just fine. I had added the breadcrumbs the night before but it might have been better to add them right before putting it in the oven. Overall a delicious dish that I'm excited to try again (when Michael and I aren't trying to eat healthy). 

What are some of your favorite holiday dishes? Favorite holiday experiments?


Wednesday, March 21, 2012

The Luck o' the Irish

This post isn't so much about luck as it is corned beef. And maybe a little luck. I will say that I'm still getting the hang of blogging and therefore didn't document my process. Bummer right?! So while many people have already nursed and forgotten their St. Patty's Day hangovers and adventures I spent mine being productive. With Michael celebrating the kick off of March Madness instead of St. Patty's Day we had our own St. Patty's Day last night. Michael loves corned beef and cabbage, and unfortunately has missed out on it the last few St. Patty's Days so when we saw some at Costco we snagged it.

I on the other hand have always had a more skeptical relationship with corned beef. Not sure why but I've always had the image in my head of it being along the lines of SPAM. Unappetizing to say the least. And cabbage, well its cabbage. Enough said.

Looking for recipes I wanted something that wasn't labor intensive and had good reviews. The recipe I went with actually ended up coming to me. See good things happen to those to wait! Or those who are too lazy to find a recipe on their own...

Anyways, I'm on the AllRecipes.com daily recipe mailing list and when a good looking corned beef and cabbage recipe popped up in my Inbox I ran with it. It was simple, had two steps (love), had the basic ingredients that I've seen in other recipes and (get this!) was for a slow cooker. Hallelujah! Most of the other recipes had me taking the corned beef and cabbage in and out of the oven for multiple hours. I don't have that kind of time on a work night. Or really on a Saturday (reason: go to the paragraph above...lazy). Plus I love my Crock-Pot.

Corned Beef and Cabbage
Adapted from: allrecipes.com/Recipe/Slow-Cooker-Corned-Beef-and-Cabbage

Ingredients:
  • 4 large carrots, peeled and cut into matchstick pieces or a handful of baby carrots
  •  8 baby red potatoes, quartered
  • 1 onion, peeled and cut into bite-sized pieces
  • 4 cups water
  • 1 (4 pound) corned beef brisket with spice packet
  • 6 ounces beer
  • 1/2 head cabbage, or one small head coarsely chopped
 Directions:
  1. Place the carrots, potatoes, and onion into the bottom of a slow cooker, pour in the water, and place the brisket on top of the vegetables. Pour the beer over the brisket. Sprinkle on the spices from the packet, and cover.
  2. Cook the brisket for about 8 hours. An hour before serving, stir in the cabbage and cook for 1 more hour. 
Easy peasy. Other than me spilling the spice packet into the sink. Not recommended. I ended up cooking it on Low for 10 hours (8 and 10 hours are set for Low, so I'm not sure how someone would set it for High for 8 hours) and it turned out fantastic. By the time I got home (the house smelled delicious) it was on warm and I just threw the cabbage in the broth on the warm setting roughly an hour before serving and it turned out nicely. I had a brisket just under 4 pounds and it served 6 people just fine (and barely fit in the crock-pot by the time everything else was in there!).


We served it with bread (the bakery bread with garlic chunks in it...yum) but it also would have been really nice with sourdough bread. Michael had the idea to try the corned beef with Hoisin Sauce and claimed it turned out really good. Something to think about I suppose. 


Quite glad corned beef was a success, and I'm no longer scared of it. What were your St. Patty's Day adventures? You'll be reading about mine in the next couple days!

I've Been Framed!!!


Finally! So before I bore you all with another post on framed items I would like to wish you a Happy First Day of SPRING (yesterday)! The calendar claims it's here, but I'm not buying it. You would think that growing up in the Northwest I would be used to the weather by now. I'm not.  I'm chalking this up to two things: one being that my life up until two years ago was dictated by the changing quarters/semesters in school not by the actual changes in seasons, and two that when it was actually sunny out I was able to take advantage of it and go play where as now I have joined the ranks of the real world and yes have responsibilities. One of which is to not just up and leave work when its nice out. Phooey.

I would also like to apologize for boring you with another post along the topic of frames. One reason this is happening is because this is the first place it hasn't mattered how many holes we put in the wall so I'm going hanging crazy, and two is because the project posts I've been REALLY excited about doing are taking a bit longer than I was hoping (stay tuned this week though, they'll be up I promise!). So here goes nothing.

This weekend while Michael was out of town I took advantage and started a bunch of crafts/projects I've been wanting to do for a while, and threw in a last minute brilliant idea one. I actually did paint the file cabinet this weekend (post about that later) but I'm not sure I'm loving the color I picked out well over 2 years ago. Oops. Cleaned out the car (with the addition of Molly my car cleanliness has suffered, been long overdue and finally did it) went house hunting for Michael's sister Sara, started another project (debuting this week or next!) and got some house cleaning done. Super go me!

Now to framing :-)
 

I started out with this guy, its the back of a Sailor Jerry's label. Love the designs they have. Since its an awkward shape (not regular frames sizes) I hoped to find a 4" x 6" frame with a mat in it but apparently they're not very common. My plan was to just use the back side of the "stock image" that came with the frame but it was white and looked awful. Luckily the other frame I purchased for a picture of Bayley, my childhood dog, had a black "stock image" that worked perfectly. I think it fits nicely on the frame wall :-)


Next went one of the better pictures of Bayley that I have. She passed in 2009 just before turning 17. She was an amazing dog, just wonderful and lived a long life. We adopted her from the Whatcom Humane Society when she was 8 months old, at first my sister who was 4 or at the time was scared of her because she had so much energy. That didn't last long at all. I miss her dearly.


Finally I hung up another paining my great-grandmother did. I've had it framed for a while, I purchased the frame and mat that the painting rests on at Aaron Brother's when they were having their penny sale last summer. The reason it's taken me so long to hang it is because I haven't had a good idea of where to put it. Its a white frame which I don't normally do and therefore doesn't exactly flow with the rest of our wall hangings.


Luckily I found just the spot for it in this house :-).


This is the "landing" and the only sets of stairs we have in the house. The door on the left goes out to the back yard and the door to the right goes to the basement. Its also our accent corner walls, I'm not generally attracted to reds but I also can't think of what else to paint this accent wall.


I think with all the white trim and the red tones it really fits well there. It  helps that I get to see a little reminder of my great-grandmother every day. She was a pretty big influence in my younger years, I say pretty big in the sense that many people never get to meet their great-grandparents, but she still had quite an impact when I was growing up. She was a phenomenal baker. I mean out of this world. Apparently not much of a cook though. She had been baking for so long that she never used a recipe. She wrote the recipes down for the family but whenever we try and re-create them they're never the same.


She also knit and sewed, the typical great-grandmotherly way. I still have a few knit blankets and a patchwork doll quilt she made me. I actually wanted to learn how to knit so that I could do something similar for my great-grandchildren (I suppose the children will have to happen first, and who knows if we'll ever have them so I'm getting slightly ahead of myself). And painting. She loved it. She used to sell her paintings in California when she lived there. She inspired and encouraged my mom to follow her artistic ability (my mom is also an amazing artist, I on the other hand did not get that gene). Tangent aside she was a wonderful woman and I'm thankful I had her in my life.

Who made an impact on your childhood years? Anyone have their own framing and decor hanging adventures?

Thursday, March 15, 2012

Hang Ups

art, wall decor, decor, frames, skeleton keys,
As discussed in my previous post I had my reservations about starting my picture wall. I wasn't sure what to hang, how to arrange it and how it was going to look. I knew I wanted to use black frames, that's what I have the most of and personally I think it looks the classiest/sharpest, and I loved the idea of having items framed or showcased instead of all pictures. Well along came my saving grace! Jillian's beautiful skeleton key art piece kicked my butt into high gear and my wall was started.


Now I'm of the eyeball and hang variety so once this was hung (on the hook stuck in the wall from the previous owners...really have no idea what they did to it to make it impossible to remove) I just started grabbing things that I had framed, that I wasn't sure where else to put and I wanted to display in some way and went to town! Next came a trio of pictures that our good friend Samie Taitano took for her portfolio (she's a fantastic photographer and starting up her photography business...click on her name link to find her on facebook!! And then hire her! :-).


They are not engagement shots, I promise! We took them down at the Seattle Sculpture Park which is a fantastic location for photos, so much texture and variety. So lets talk the frame. Love the frame. And love where I got it. Aaron Brothers. They do a, I think its about twice a year, framing sale where you buy one frame and the second frame is a penny. A PENNY. Even with that I went near broke on frames last July. They just had another one in January which I so unfortunately missed. Do I bought two of said frame above. And many more that you will be seeing later.


Then went up my map of Greece. My sophomore year in college I did a study abroad there and fell head over heels in love with Greece. Amazing country, I can't wait to go back. My grandma had some old map books and I snagged the Greece page and then found the perfect frame laying around...don't you just love when that happens?!


Now there's a little known fact that I have a thing for skeleton keys. A mild obsession, no big deal. And it started with this beauty.


It's from Pier 1 and I've had it forever.  I love it. So knowing this Michael's darling sister gave us a super thoughtful lovely house warming gift that her friend created.


So sweet. A few other things that I put on the wall to display are a boomerang that Jillian got me from her study abroad in Australia


And a painting my great-grandmother did


And the final product! I love it, and am definitely not opposed to expanding it. I already have a few ideas of things I want to hang. The picture in the upper right hand corner is one of my mom when she was about 4 or 5 years old.


Tomorrow I'll put together a tutorial and review of tissue paper poms that I made for Jillian's bridal shower! Bet you can't wait :-)!